2025-02-16 · 5 min · Jasper Dijt
Hi, my name is Jasper, I am a software engineer from the Netherlands and this is my first blog post on my personal blog.
For a long time I have been thinking of starting a blog / personal website.
My reasons for this are multiple and include things like:
improving my written communication skills,
shameless self-promotion a bit of personal branding,
and giving something back to the internet.
The last one bears clarification: I spend a lot of my time on and off the job tinkering with software and I often find a lot of help in the technical articles of fellow software engineers. I feel that next to consuming, I should contribute to this space as well.
So at the beginning of February this year (2025) I decided to get started and in this first post I describe the tech stack of the blog and a bit about the process of creating it.
The tech stack
The basic idea was to have a statically generated site that:
- Can be hosted cheaply
- Is easy to maintain and customize for me
With these constraints in mind, I ended up with the following tech stack.
GitHub Pages
Hosting the site on GitHub pages is almost a no-brainer as a developer. It is super-simple to set up, I can deploy right from my source repository with minimal effort, and above all: it is free.
Quarkus Roq
There are many different static site generators of various maturity. In the end I decided to go with Quarkus Roq. Roq is fairly new so may not seem like an obvious choice. However, it is built on technology I trust and am familiar with: Quarkus, Qute, Maven. Next to that, it contains many convenient helper functions out of the box. Finally, if I ever need something custom I am confident I can immediatly get to building it because I know the base tech well.
A small sample of what I get from Roq out of the box:
- A GitHub action for deploying to GitHub pages.
- Frontmatter support
- SEO tags for all pages, based on frontmatter data.
- RSS Feeds for all posts.
- Sitemap generation
- The Quarkus web bundler for bundling & minifying javascript/css.
- And lots more...
Highlight.js
As this is a developer's blog, code highlighting is of course required. Highlight.js is the example given on this Roq blog post
Designing & implementing the site
A disadvantage of using Roq is that it is a very young static site generator and there is no big ecosystem of templates around it yet. This meant I either had to adapt a template from an existing static site generator, or put something together myself.
I opted for the latter, and put together the template you see here. All together I think the result is pretty clean and contains some nice personal touches, if you know where to look for them. Two examples:
- For the colours I looked towards my favourite editor & terminal colour scheme: Gruvbox
- For the code blocks font I used the same font as I use in my IDE: "Source Code Pro"
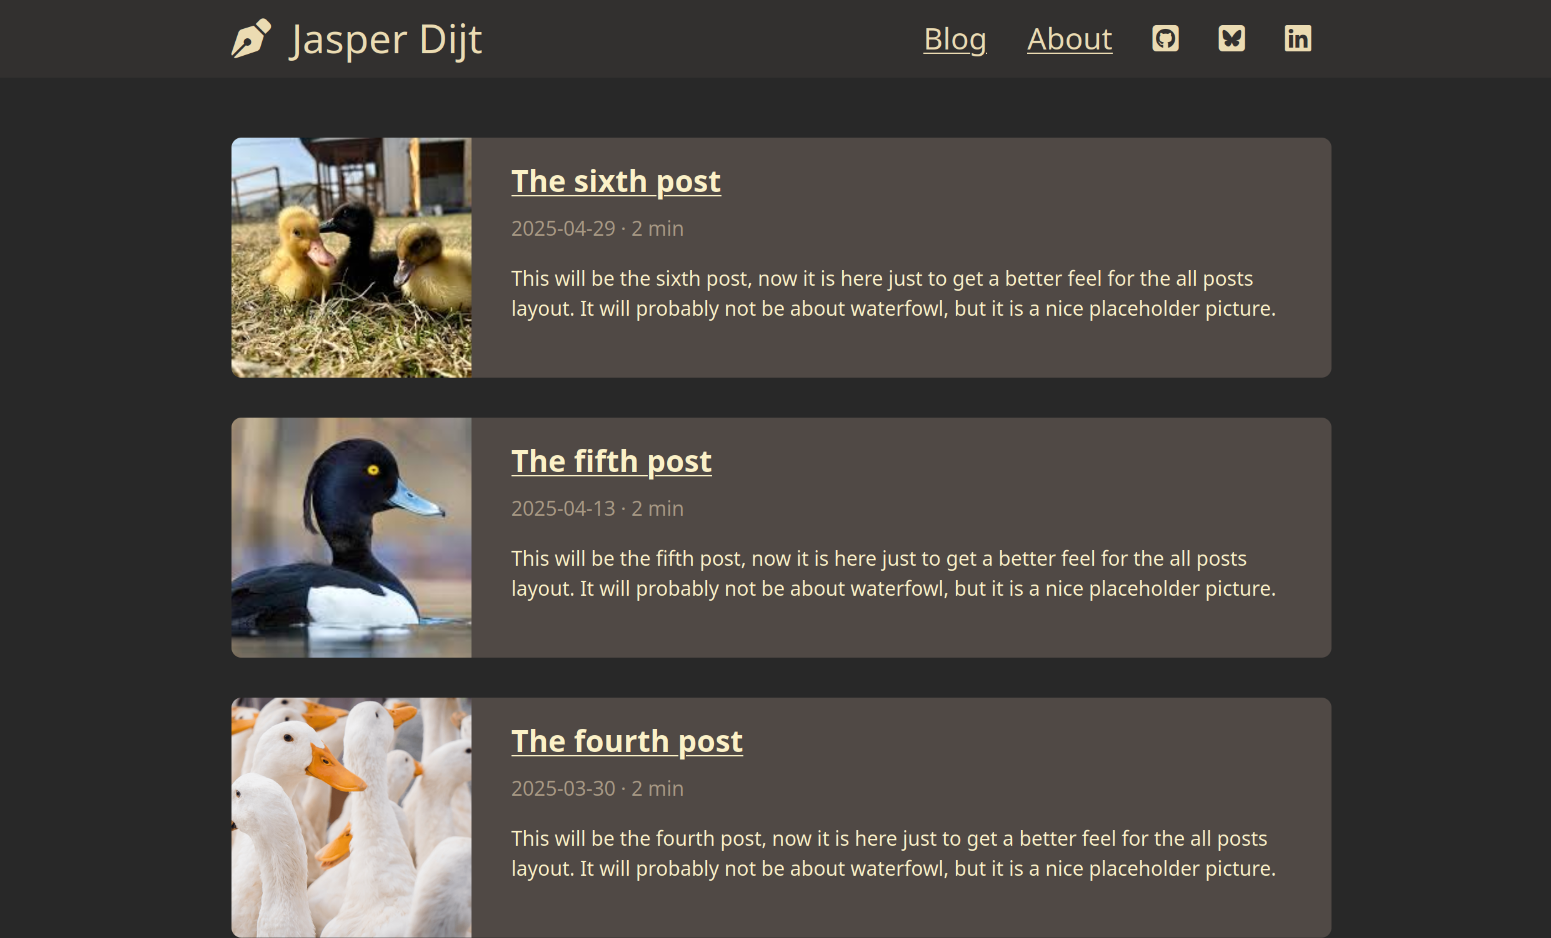
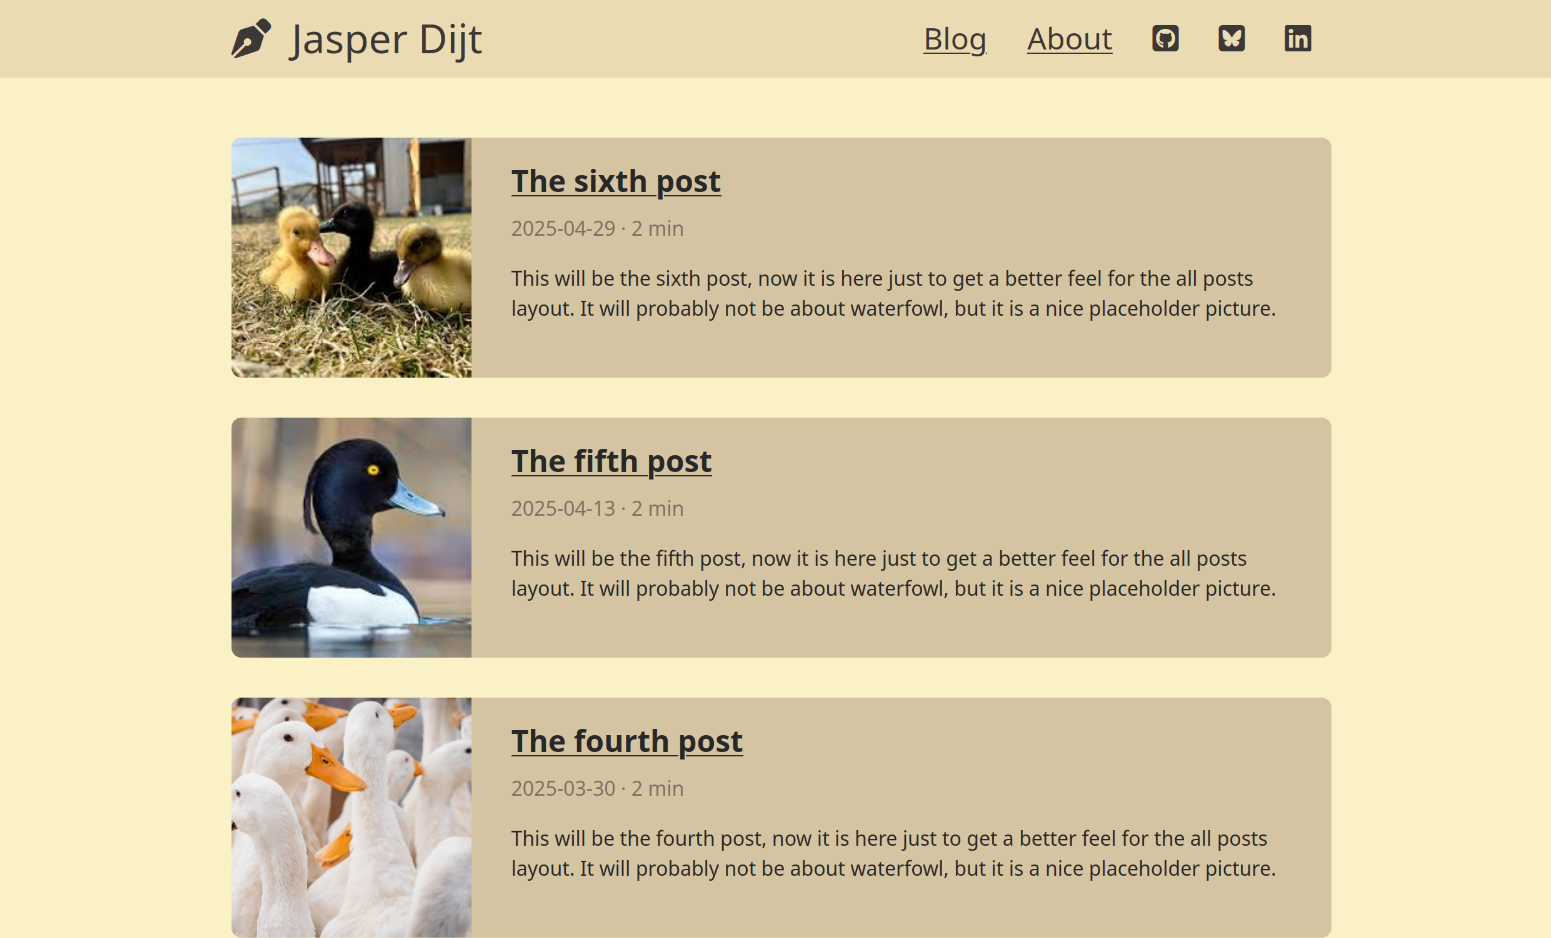
Light and dark mode
The benefit of re-using a colour scheme like Gruvbox is that it comes in a light & dark variant.
It was my first time building a site that has a dark & a light theme. I found this was really easy to handle with CSS. I defined all the colours as CSS variables using the light-dark CSS function.
In practise, I did most of the work in dark-mode and only occasionally had to check if the light mode still made sense. It always did. This is a testament to the quality of the Gruvbox colour palette, the colours just work together the same in both modes.
:root {
  color-scheme: light dark;
  // Gruvbox colours:
  // Backgrounds:
  --color-bg0: light-dark(#fbf1c7, #282828);
  --color-bg0-hard: light-dark(#f9f5d7, #1d2021);
  --color-bg0-soft: light-dark(#f2e5bc, #32302f);
  --color-bg1: light-dark(#ebdbb2, #32302f);
  --color-bg2: light-dark(#d5c4a1, #504945);
  // and so on...
}
As I did not implement a button to switch the theme yet, below are two screenshots of the dark and light mode.
Future enhancements
There is a few enhancements to the site that I already identified and will likely implement somewhere in the coming months:
- Improve the responsiveness a bit:
- Make the top-left links into a hamburger menu on narrow screens instead of just shrinking the text.
- Adding a manual override for dark/light theme
- Add support for references and footnotes in the posts. No idea how to deal with this yet, but I think that between the roq-data extension and the Qute engine's support for injecting CDI beans I have all the ingredients I need to implement this.
- Add support for image thumbnails & expanding images on click.
If I manage to keep this up the following will also have to be looked at, but now there is not enough posts for it to matter:
- Introduce pagination for the front page, probably only needed when I go over 10 posts, this is trivial with Roq but support needs to be added to my layouts.
- Introduce tags with roq-tagging plugin
- Introduce some form of analytics, at this point I'll probably get curious what posts are doing well.
- Maybe some form of search?
- Add tests: with roq I can write regular quarkus tests against the content. I'm thinking of spellchecking, validating that links are not dead and ensuring that all images have an alt-text.
- Finally, if I write any future posts about enhancing this site, it is probably nice to add the roq-series plugin as well.